How to make an SVG in Gimp
By Facundo Lander, 2022-12-15In this page I will explain how I do SVGs using GIMP. This is definetly not the right way to do it and definetly not intended to be used like an SVG maker, but if you are already familiar with GIMP this is easier than learning other graphics software.
Create an image
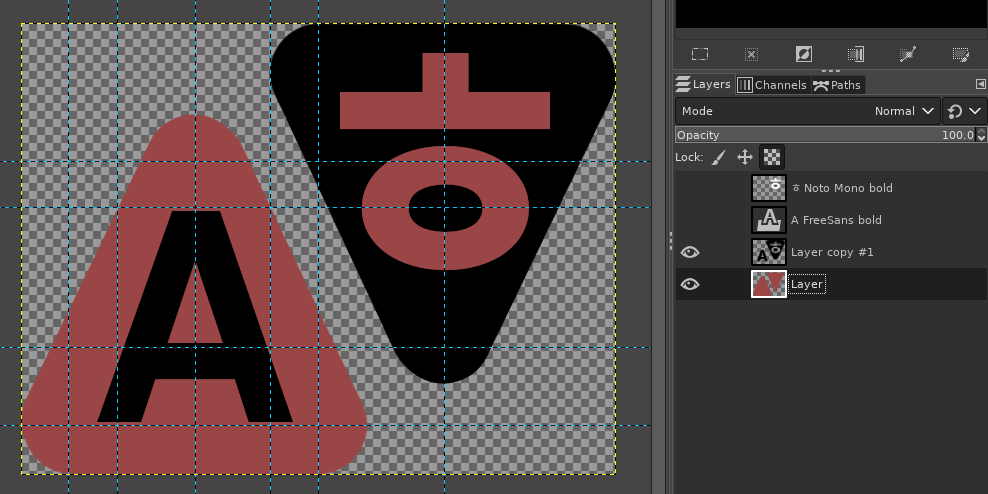
The first step is to create a design with shapes, the least amount of shapes, the easiest, I like to use one layer per color like in the following screenshot.
Export an SVG from a Path
Paths in GIMP are cool because you can export and import them in SVG format, this means that we can easily create an SVG of any shape we have in gimp.
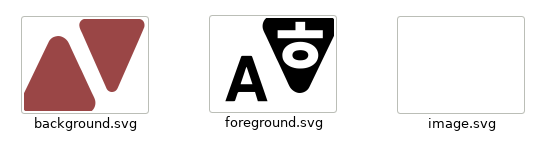
In our example, we have two layers; one that will work as a background with two triangles, and another that will work as a foreground, the letters on top.
This means that we will end up with two SVGs, one for each shape/layer. We will join them together later.
There are only two steps to make an SVG from our layers. First, we have to select the shapes themselves. To do this, right click the layer and choose the option "Alpha to Selection".
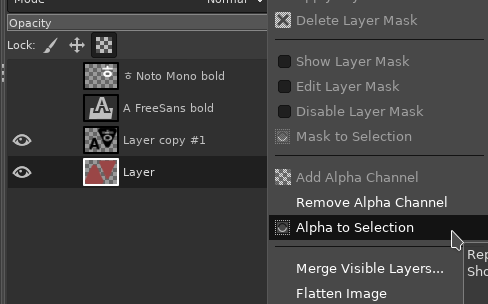
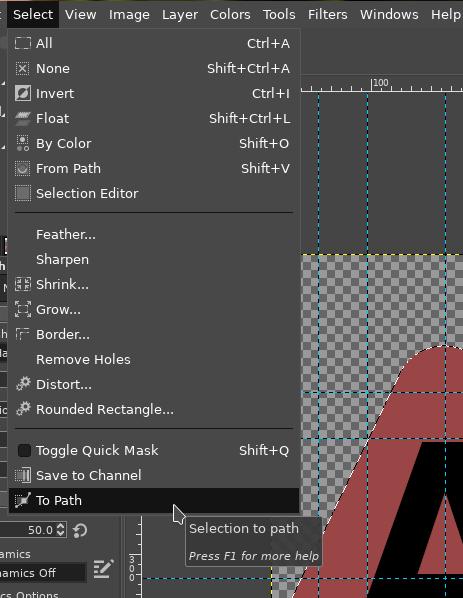
Our shape will have a visible dashed outline now. To transform this to a path we have to go to the menu > Select > To Path:
Now our path will be created under the Paths window (If you don't see it, enable it from Windows > Dockable Dialogs > Paths).
The last step is just right clicking the Path, and select "Export Path...":
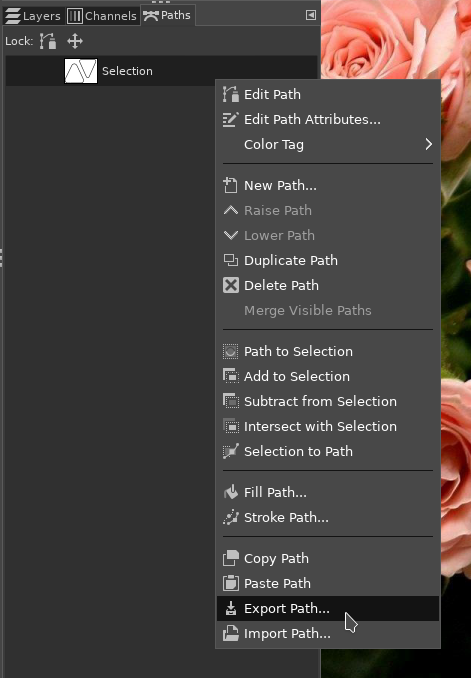
Now you need to repeat this process with the other layers.
Join the SVGs
Now we have as many files as layers/shapes we had in GIMP, we have to join them in one single SVG file. Also, we have to set the colors again, because the export only saves the shape.

The layout of the exported SVG looks like this:
<?xml ...?>
<!DOCTYPE svg ...>

<svg ...>
    <path id="Selection" fill="none" stroke="black" stroke-width="1" d="..." />
</svg>
Here we only care about the path tag. Here we can
change the id to identify what this shape is; in our example case,
either background or foreground.
We can also set the shape colors here with the fill attribute. I usually
remove the stroke and stroke-width attributes if I don't need an outline.
After we change everything we need, now it's time to create a new blank SVG and move all the shapes inside.
In our blank file we we will have to copy some attributes from any of the exported Paths, we can start by just copying all content from one of the Paths to the new SVG. In this example case I will copy all contents from background.svg into image.svg
After that, we can copy only the path tag from the foreground
SVG after the path tag in our new SVG file. It has to be after
since tags follow the order from back to front inside the SVG.
Now, the structure of the new SVG should be something like:
<?xml ...?>
<!DOCTYPE svg ...>

<svg ...>
    <path id="Background" fill="#9A4646" d="..." />
    <path id="Foreground" fill="black" d="..." />
</svg>
And now the SVG is ready! We can complete it by adding copyright and other metadata. An example of how to add this information using dublin core tags can be found here.
